Hey there, crafty friends! Get ready to add a touch of spooky-cute charm to your home because we’re diving into the wonderfully whimsical world of Halloween crochet with these FREE Ghost Doily patterns! Imagine delicate, ethereal ghosts dancing on your tables, peeking out from under your vases, or adding a playful accent to your shelves. These charming doilies are designed with simplicity and sweetness in mind, making them an absolute delight for crocheters of all levels, especially those just starting their yarn adventures.
Looking for the perfect handmade gift for your favorite ghoul or a unique piece of decor to set the Halloween mood? You’ve come to the right place! In this article, you’ll discover how to create these adorable ghost doilies with easy-to-follow instructions. We’ll guide you through the stitches, share tips for a perfect finish, and have you spooktacularly stitching in no time. Let’s grab our hooks and get ready for some hauntedly good crafting!
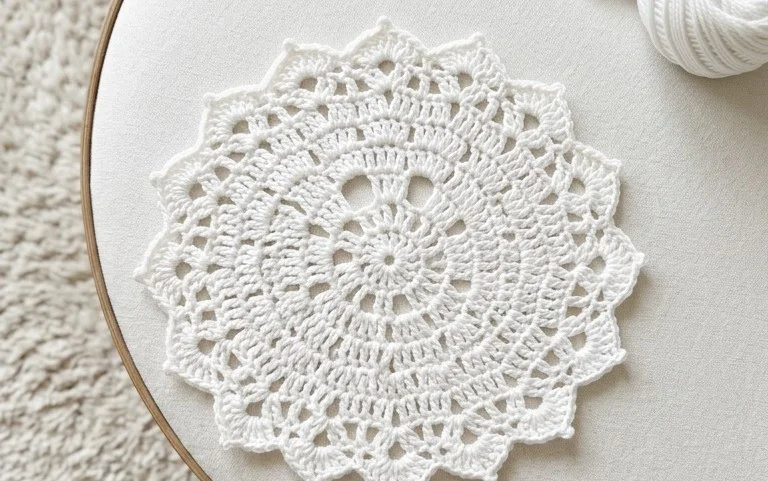
Haunt Your Home with Adorable Ghosts: A Free Crochet Pattern Guide
This Halloween, let your crafting spirit run wild with the “Halloween Ghost Doily Free Crochet Pattern” from DIY Magazine! This charming pattern is perfect for adding a touch of spooky, yet undeniably cute, festivity to your home decor. Whether you’re a seasoned crocheter or just dipping your toes into the yarn-iverse, this project offers a delightful and achievable way to embrace the season. Get ready to create a collection of playful ghosts that will enchant your guests and add a warm, handmade glow to your Halloween celebrations.
Gathering Your Ghastly Goodies: Yarn and Hook Recommendations
To bring these adorable ghosts to life, you’ll need a few essential supplies. The beauty of this pattern lies in its simplicity, allowing for a variety of yarn choices to suit your desired outcome.
Yarn: For the classic ghost look, a worsted-weight acrylic yarn in a crisp white or off-white is ideal. Acrylic is a fantastic choice for beginners as it’s durable, easy to care for, and readily available in a wide array of colors. If you’re aiming for a slightly more delicate feel, a DK-weight yarn can also work beautifully, though it will result in a smaller doily and require a smaller hook. For a truly unique Halloween twist, don’t be afraid to experiment with glow-in-the-dark yarn for an extra spooky effect when the lights go out!
Hook: The pattern typically calls for a 4.0mm (G/6) crochet hook. However, this can vary slightly depending on your yarn choice and personal tension. If you’re using DK-weight yarn, you might opt for a 3.5mm (E/4) hook. It’s always a good idea to check the yarn label for recommended hook sizes and make a small swatch to ensure your stitches are neither too tight (making the fabric stiff) nor too loose (creating unwanted gaps).
Mastering the Magic: Stitch Techniques You’ll Employ
This ghost doily pattern is designed to be accessible, utilizing fundamental crochet stitches that most crafters will be familiar with. Even if you’re new to some of these, they are relatively easy to learn and master.
Magic Ring (or Chain 2 Method): Many doily patterns begin with a central ring to create a neat and tight center. The magic ring is a popular choice as it allows you to cinch the center closed. Alternatively, you can start with a chain of 2 and work your first round of stitches into the first chain.
Single Crochet (sc): This is the most basic crochet stitch, creating a dense and firm fabric. It will form the solid body of your ghost.
Half Double Crochet (hdc): Slightly taller than a single crochet, the half double crochet adds a bit more texture and drape.
Double Crochet (dc): This stitch creates a taller, looser stitch, which will be used to build out the shape and create decorative elements of the doily.
Chain (ch): The foundation of most crochet projects, chains create the loops that you’ll work your stitches into.
Slip Stitch (sl st): Used to join rounds and create a smooth finish, slip stitches are essential for connecting your work seamlessly.
Increases (inc): To make your doily grow outwards, you’ll be working multiple stitches into a single stitch from the previous round. This is typically done with increases in single, half double, or double crochet stitches.
Decreases (dec): While not always present in simple doily patterns, some variations might incorporate decreases to shape the piece. This involves working two or more stitches together as if they were one.
Ghostly Guidance for Beginners
If you’re new to crochet, don’t be intimidated! This ghost doily is a fantastic project to build your confidence. Here are some tips to help you on your crafty journey:
Practice the Stitches: Before diving into the doily itself, take some time to practice each of the stitches listed above. Work up small swatches of each to get a feel for them. There are countless free video tutorials available online that demonstrate these techniques clearly.
Read the Pattern Carefully: Before you begin crocheting, read through the entire pattern at least once. Familiarize yourself with the abbreviations and the order of the rounds.
Use a Stitch Marker: For round-based patterns like this doily, stitch markers are your best friend! Place a marker in the first stitch of each round to easily keep track of where you are and avoid losing your place.
Maintain Consistent Tension: Try to keep your stitches as consistent as possible. This will result in a more even and professional-looking finished product. Don’t pull too tight, but also don’t let your stitches become too loose.
Don’t Be Afraid to Frog! “Frogging” is crochet lingo for ripping out your work. If you make a mistake and notice it early on, it’s much easier to undo a few stitches than to try and fix a larger error later.
Block Your Work: Once your doily is finished, blocking is a crucial step that will transform it. Blocking smooths out stitches, evens out the shape, and makes the doily lay flat and display its intricate details beautifully.
Personalizing Your Poltergeist: Customization Ideas
One of the most enjoyable aspects of DIY projects is the ability to put your own unique spin on them. This ghost doily is no exception!
Color Play: While white is classic for ghosts, consider other Halloween-inspired colors:
Spooky Black: A black doily can be incredibly chic and sophisticated.
Vibrant Orange: Embrace the pumpkin patch with a fiery orange ghost.
Mysterious Purple: Add a touch of enchantment with a deep purple.
Lime Green: For a more playful, “monster” vibe.
Two-Tone Ghosts: Alternate rounds of white with a contrasting color for a striped effect, or use a contrasting color for the eyes or mouth details.
Size Matters:
Smaller Ghosts: Use a lighter weight yarn (like sport or fingering weight) and a corresponding smaller hook to create miniature ghost doilies, perfect for embellishing gift tags or smaller accent pieces.
Larger Ghosts: For a grander statement, use a heavier weight yarn (like bulky or super bulky) and a larger hook. This will result in a significantly larger doily, ideal for a centerpiece or a wall hanging.
Adding Embellishments:
Eyes and Mouths: Once your ghost is complete, you can crochet and attach small black or contrasting colored circles for eyes and a simple chain or French knot for a mouth. Alternatively, use fabric paint or embroidery floss for these details.
Borders: Experiment with different border stitches to add unique edges to your doily. Simple picot edgings or shell stitches can add a lovely touch.
Caring for Your Crafted Companions
To ensure your handmade ghost doilies remain a treasured part of your Halloween decor for years to come, proper care is essential.
Washing: Most acrylic yarns are machine washable. Gently hand wash your doily in cool water with a mild detergent. If machine washing, place it in a mesh laundry bag and use the delicate cycle. Avoid using bleach, as it can damage the fibers and potentially alter the color.
Drying: Never put your crocheted items in a machine dryer, as the heat can cause them to shrink, warp, or melt (especially if using acrylic yarn). Instead, gently squeeze out excess water (do not wring) and lay the doily flat on a clean towel or drying rack, reshaping it to its original dimensions while damp.
Storage: Store your doilies flat to prevent creasing. You can place them between layers of tissue paper or in a breathable fabric storage bag.
Beyond the Doily: Project Ideas for Your Haunting Creations
Once you’ve mastered the ghost doily, your creativity can continue to haunt! Here are some inspiring project ideas:
Table Runner Accent: Create a series of ghost doilies and arrange them along a table runner for a festive Halloween dining experience.
Window Decorations: Lightly starch your doilies and hang them in your windows for a delicate, spooky effect as light shines through them.
Gift Embellishments: Attach a mini ghost doily to your Halloween gifts for a charming, handmade touch.
Garland Creation: String multiple ghost doilies together on a yarn or ribbon to create a unique and spooky Halloween garland.
Coasters with a Twist: For smaller versions, these can serve as delightfully quirky coasters for your Halloween party beverages.
Appliqué Accents: Sew your finished ghost doilies onto fabric projects like tote bags, pillow covers, or even plain t-shirts for a custom Halloween look.
Centerpieces: Arrange several doilies of varying sizes on a mantelpiece or buffet table for a captivating Halloween display.
With the “Halloween Ghost Doily Free Crochet Pattern,” you have the power to infuse your home with whimsical charm and a touch of spooky delight. So, grab your hook, pick your yarn, and let the crafting commence. Happy haunting, and happy crocheting!
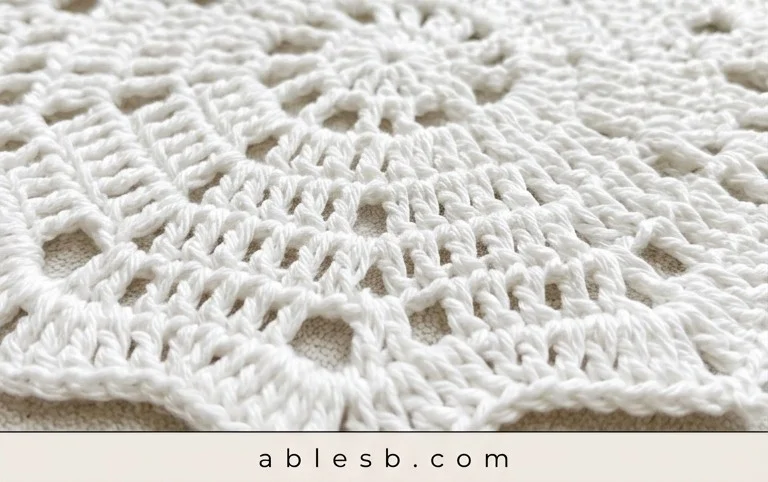
We hope these adorable Halloween ghost doily patterns have sparked your crafting spirit! They’re the perfect way to add a touch of spooky charm to your home this season, and surprisingly quick to whip up. We truly encourage you to grab your hook and yarn and give one of these ghostly designs a try – you might surprise yourself with how much fun they are to create!
Once your spectral creations are complete, we’d love to see them! Share your finished ghost doilies on social media using #DIYGhostDoily so we can all admire your handiwork. Don’t be afraid to get creative with color variations, add glitter for extra sparkle, or even string them together for a festive garland. And remember, this is just the beginning of your DIY Halloween crafting journey. Be sure to explore more of our exciting patterns for endless creative inspiration!