Hello, fellow yarn lovers and Disney enthusiasts! Are you ready to add a touch of wicked charm to your crafting world? Today, we’re diving into a project that’s as enchanting as it is deliciously spooky: crocheting your very own Poisoned Apple! Imagine a plump, ruby-red apple, its smooth surface hinting at secrets, topped with a jaunty little stem and a leaf – a perfect, miniature replica of the iconic treat from Snow White.
This pattern is an absolute dream for crocheters of all skill levels, especially if you’re just starting out and eager to build your amigurumi skills. It also makes for an unforgettable, handmade gift for that special someone who adores all things Disney. Plus, can you just picture this little gem perched on a shelf as a unique piece of home decor? Throughout this guide, you’ll learn simple stitches, shaping techniques, and how to create those classic apple curves, all while having a ton of fun. Let’s grab our hooks and get ready to craft some magic!
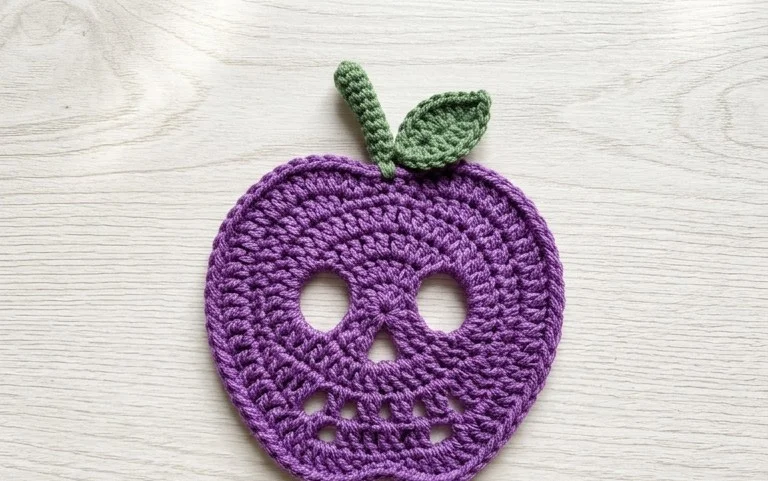
You Can Crochet a Poisoned Apple for the Person Who Loves Disney
There’s a certain magic that emanates from Disney stories, a blend of whimsy, adventure, and sometimes, a touch of deliciously wicked charm. And what better way to capture that enchantment than by crocheting a symbol of one of the most iconic tales? We’re talking about the Poisoned Apple, of course! This project is perfect for any Disney aficionado who appreciates the darker, more alluring side of fairy tales. Whether you’re a seasoned crocheter looking for a fun, quick project, or a beginner eager to sink your hooks into something delightful, this pattern is designed with you in mind. Get ready to create a piece that’s both visually striking and a wonderful nod to classic Disney lore.
Yarn and Hook Recommendations: The Foundation of Your Enchanted Apple
Choosing the right yarn and hook is crucial for bringing your poisoned apple to life. We want it to have a satisfying weight, a beautiful sheen, and a texture that feels just right in your hands.
Yarn: For this project, we recommend using worsted weight yarn. This is a versatile yarn weight that works up quickly and provides a good balance between structure and softness. It’s also readily available in a fantastic range of colors, making it easy to find the perfect shades for your apple.
Red: The quintessential color for our poisoned apple. Look for a rich, deep red, or perhaps a brighter, more vibrant cherry red depending on your desired level of “poison.”
Green: A small amount of green yarn will be needed for the stem. A mossy green or a brighter, leaf-like green would work well.
Brown: For the optional leaf detail, a warm, earthy brown is ideal.
Hook: The hook size you choose will depend on your personal crocheting tension and the yarn you select. However, a good starting point for worsted weight yarn is usually a 4.5mm (US 7) or 5mm (US H-8) crochet hook.
Tip for Beginners: If you’re unsure about your tension, try crocheting a small swatch with your chosen yarn and hook. If it feels too stiff, go up a hook size. If it feels too loose and you can see large gaps between stitches, go down a hook size. The goal is a fabric that’s firm enough to hold its shape without being overly stiff.
Stitch Techniques to Master: Building Your Apple, Stitch by Stitch
This project utilizes a few fundamental crochet stitches that are perfect for beginners to practice and for experienced crafters to execute efficiently.
Essential Stitches:
Magic Ring (or Magic Circle): This is how we’ll start our apple seamlessly, creating a tight center with no holes. It’s a technique worth learning for any amigurumi or round crocheting projects.
Single Crochet (sc): This is the workhorse stitch of amigurumi and many other crochet projects. It creates a dense and sturdy fabric, perfect for giving our apple its shape.
Increase (inc): To make our apple grow in circumference, we’ll be using increases. Typically, this involves working two single crochets into the same stitch.
Decrease (dec): To shape the top and bottom of the apple, we’ll use decreases. The invisible decrease (working into the front loops of two stitches) is recommended for a neater finish, but a standard decrease will also work.
Slip Stitch (sl st): This stitch is used to join rounds and create a neat edge.
Optional Stitch for the Stem:
Chain (ch): We’ll use chains to create the foundation for our apple stem.
Tips for Beginners: Crafting with Confidence
If you’re new to crochet, don’t be intimidated! This poisoned apple is a fantastic project to build your skills.
Practice the Magic Ring: The magic ring can be a bit fiddly at first. Watch a few video tutorials to see it demonstrated from different angles. Once you get the hang of it, it becomes second nature!
Use a Stitch Marker: To keep track of your rounds, especially when working in continuous spirals, a stitch marker is your best friend. Place it in the first stitch of each round.
Count Your Stitches: Regularly count your stitches at the end of each round. This will help you catch any mistakes early on and ensure your apple is shaping up correctly.
Don’t Be Afraid to Frog: “Frogging” is crochet slang for undoing your work. If you realize you’ve made a mistake, it’s okay to carefully pull out your stitches and start that section again. It’s all part of the learning process!
Stuffing Wisely: When stuffing your apple, start with small amounts and gradually add more. Push the stuffing towards the outer edges to create a smooth, rounded shape. Avoid overstuffing, which can distort the stitches and make it difficult to close the opening.
How to Customize: Making Your Apple Uniquely Yours
The beauty of crochet is its adaptability! Here’s how you can personalize your poisoned apple:
Color Palette:
Beyond Red: Don’t feel confined to a traditional red! Consider a deep, dark burgundy for a more sinister look, a vibrant fuchsia for a playful twist, or even a subtle ombré effect by gradually changing shades of red.
The Stem and Leaf: Experiment with different shades of green for the stem and leaf. You could even make the stem a contrasting color to the apple for a pop of visual interest. Perhaps a black stem for an extra touch of dark charm?
Size:
Larger Apple: To create a bigger apple, simply continue increasing for more rounds before beginning the decreasing section.
Smaller Apple: To make a smaller apple, work fewer increase rounds.
Adding Details:
Embroidered Face: Use black embroidery floss to stitch a subtle, mischievous grin or a pair of curious eyes onto your apple.
Sparkle and Shine: Incorporate some metallic yarn for the stem or even a few strands worked into the apple itself for a magical shimmer.
A Bite Mark: For a truly iconic look, you could crochet a small, crescent-shaped piece in a contrasting color (like a creamy white or light yellow) and sew it onto the apple to represent a bite.
Care Instructions: Keeping Your Enchanted Creation Pristine
Once your poisoned apple is complete, you’ll want to keep it looking its best.
Spot Cleaning: For minor spills or dust, the best method is spot cleaning. Use a damp cloth with a small amount of mild soap. Gently dab the affected area and rinse with a clean, damp cloth.
Hand Washing (if necessary): If a more thorough cleaning is needed, hand wash your apple in cool water with a gentle detergent. Avoid wringing or twisting, which can distort the shape. Gently squeeze out excess water.
Drying: Lay your apple flat on a clean towel and reshape it as needed. Allow it to air dry completely. Avoid direct sunlight or heat, which can cause colors to fade or the yarn to become damaged.
Stuffing Maintenance: Over time, the stuffing might settle. You can gently fluff it up by squeezing and manipulating the apple.
Project Ideas: More Than Just a Prop!
Your crocheted poisoned apple is incredibly versatile! Here are a few ideas to inspire you:
Disney-Themed Decor: This is the most obvious and perhaps the most delightful use! Display it on a shelf, a mantelpiece, or alongside other Disney collectibles. It’s a perfect addition to a themed room.
Halloween Amigurumi: Obvious, right? This apple is a fantastic addition to your Halloween decor, adding a touch of fairy tale spookiness.
Costume Accessory: Imagine this apple peeking out of a bag or being held by someone dressed as the Evil Queen!
Gift for a Disney Fan: This handmade treasure is a thoughtful and unique gift for any Disney enthusiast, especially those who appreciate the storytelling of Snow White.
Keychain or Bag Charm: For a smaller version, adjust the stitch count and use a lighter yarn. Attach a keychain ring or a sturdy clasp for a charming accessory.
Playtime Pal: For children who love Disney stories, a soft, crocheted apple can be a safe and beloved toy.
Crocheting this poisoned apple is more than just following a pattern; it’s about capturing a piece of beloved storytelling in yarn. So grab your hook, pick your favorite shade of red, and get ready to create a little piece of Disney magic!
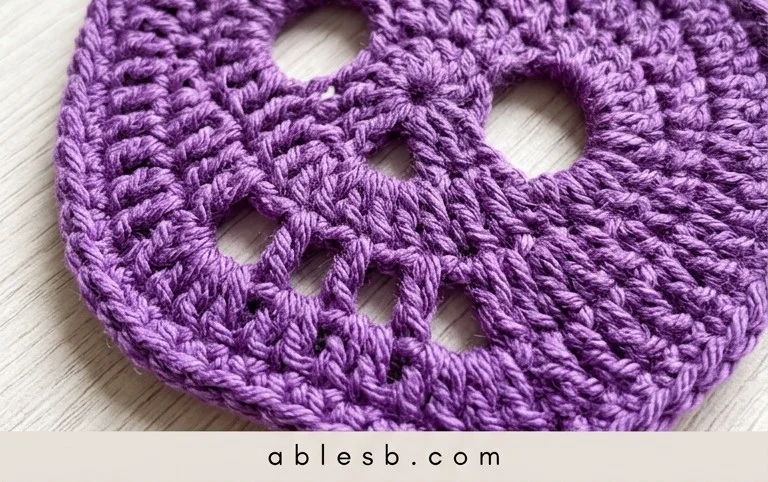
So there you have it – your very own crocheted poisoned apple, ready to charm (or delightfully spook!) any Disney enthusiast. We hope you’ve had as much fun bringing this deliciously wicked treat to life as we did designing it. Don’t be shy, give this pattern a try! We’d absolutely love to see your finished creations. Share them on social media using #CrochetPoisonApple and tag us so we can ooh and aah over your handiwork!
Feeling adventurous? Consider adding a sparkly “poison” drizzle, or perhaps a cute little stem with a leaf. The possibilities are as boundless as your imagination! And when you’re ready for your next crafting adventure, be sure to explore our other patterns. Happy crocheting!